Gluten Free Sourdough Recipe: Bake Tangy Bread at Home
We may earn a commission for purchases made using our links. Please see our disclosure to learn more.
If you love the tangy, chewy goodness of sourdough bread, then this recipe is for you! This simple gluten free sourdough recipe doesn’t require much time and effort. Plus, the ingredients? They are pretty straightforward. Learn how to maintain a gluten free sourdough starter and master the art of fermentation with this guide!
Why Gluten-Free Sourdough?
Gluten free sourdough bread is a healthier alternative for people who have celiac disease. This bread is made with a culture of yeast and bacteria (that break down carbs) so it’s easier for your body to absorb. This bread is flavorful, nourishing, and made with care. Think of it as an upgrade! Imagine biting into a loaf so good, you’ll forget it’s gluten-free. That’s the magic of sourdough, delicious and nutritious all at once.
The Magic of Sourdough Starter
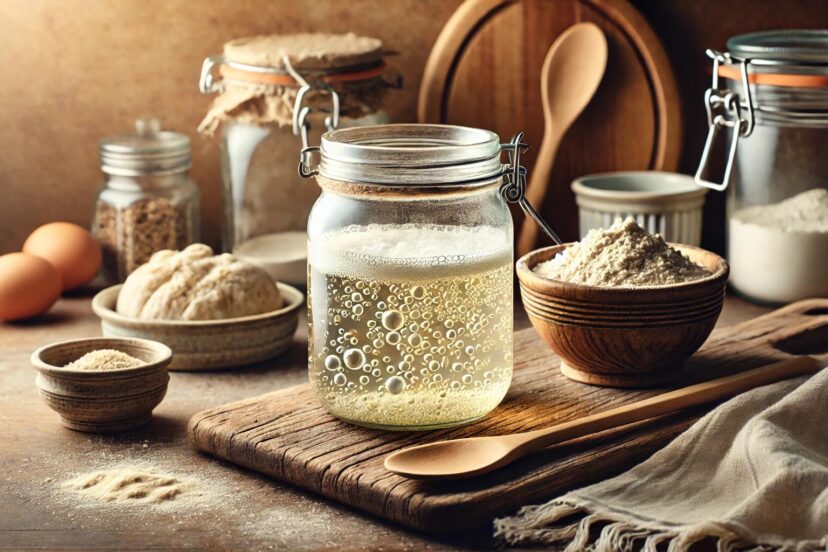
Let’s talk about the star of the show: the sourdough starter. This humble mixture of flour and water is like the bread’s beating heart, alive with wild yeast and good bacteria. Over a few days, it transforms into a bubbly, tangy concoction, ready to bring your bread to life. Think of it as adopting a pet. It needs feeding, attention, and a little love. But the reward? Oh, it’s worth every bit of effort. A starter isn’t just an ingredient—it’s a living, breathing promise of delicious bread.
Choosing Your Gluten-Free Flour
Flour is the foundation of your sourdough. It’s the canvas on which your bread’s flavor and texture are painted. Gluten free sourdough recipe calls for a symphony of flours, each bringing its unique note to the mix:
- Brown Rice Flour: Mild and nutty, it’s the dependable backbone.
- Sorghum Flour: Adds a delicate sweetness and structure.
- Tapioca Starch: The secret to that glorious chewiness.
- Buckwheat Flour: Earthy and rustic, for a hearty loaf.
Choosing your flour is like choosing the spices for a stew—each one shapes the final masterpiece.
Essential Tools for Gluten-Free Sourdough
Before you roll up your sleeves, let’s talk tools. Picture this as assembling your baking toolkit. You’ll need:
- A large glass jar, your starter’s cozy little home.
- A mixing bowl, where all the magic begins.
- A kitchen scale because in baking, precision is your best friend.
- A Dutch oven or baking stone, your ticket to that crackling crust.
With these by your side, you’re ready to conquer the world of gluten-free sourdough.
Making Your Gluten-Free Sourdough Starter
Creating a starter feels a bit like planting a seed. With the right care, it grows into something extraordinary.
- Day 1: Mix ½ cup of gluten-free flour with ¼ cup of water. Stir until smooth, cover loosely, and let it rest in a warm corner of your kitchen.
- Days 2–5: Feed it daily with equal parts flour and water. Discard half the starter before each feeding—it’s like pruning a plant to help it thrive. By day 5, you should see bubbles dancing on the surface and catch a whiff of a tangy aroma.
Watching your starter come to life is a bit like witnessing a tiny miracle.

Common Mistakes to Avoid with Your Starter
Here’s where a little foresight can save you from frustration:
- Don’t use chlorinated water—it’s like kryptonite for your starter.
- Feed it regularly. Neglect it, and it’ll sulk (read: go dormant).
- If it smells off—like old gym socks—it’s time to start over. A healthy starter smells fresh and tangy.
Preparing the Dough
Once your starter is thriving, it’s time to bring it all together. Mixing the dough is like blending ingredients for a family recipe—it’s equal parts science and heart.
- Combine 2 cups of your chosen gluten-free flour blend, 1 cup of starter, 1 cup of water, and a teaspoon of salt.
- Stir until a sticky, shaggy dough forms. It won’t feel like traditional dough—think wetter, more like cake batter’s unruly cousin.
- Cover and let it rest. This is where the magic of fermentation works its wonders, turning simple ingredients into something extraordinary.
Shaping and Proofing
Shaping gluten-free dough can feel a bit like wrangling Jell-O—it’s soft and sticky. Wet your hands or use a bench scraper to gently coax it into shape. Place it in a parchment-lined bowl for proofing. This step requires patience. As you wait, imagine the dough preparing itself, slowly becoming something remarkable.
The Perfect Rise
Gluten-free dough doesn’t rise with the gusto of its gluten-filled counterpart. Instead, it takes its time, puffing up just enough to hint at what’s happening within. It’s subtle, but it’s there—like the first blush of dawn.
Baking the Gluten Free Sourdough Recipe
Now, for the grand finale.
- Preheat your oven to 450°F (230°C). Heat your Dutch oven too—it’s what creates that bakery-quality crust.
- Gently transfer the dough (and parchment paper) into the hot Dutch oven.
- Cover and bake for 30 minutes, letting the steam work its magic.
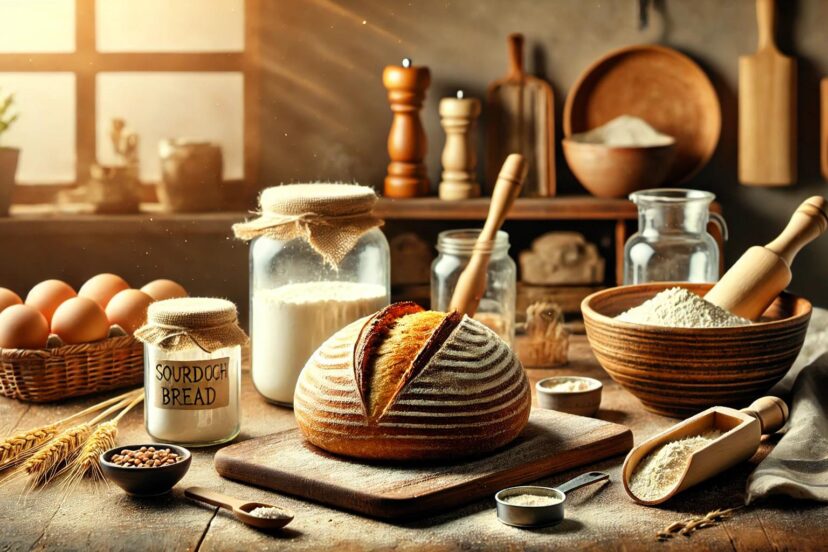
- Uncover and bake for another 15–20 minutes. Watch as the crust turns a glorious golden brown, like a sunrise in bread form.
Cooling the Bread
Here’s the hardest part: waiting. Let your bread cool completely before slicing. I know, it’s torture, but trust me—it’s worth it. The crumb needs time to set, and the flavors deepen as it rests.
Tips for the Perfect Gluten Free Sourdough
- Hydration is everything. A wetter dough yields better results.
- Don’t rush. Sourdough is a labor of love, and good things take time.
- Personalize your loaf. Add seeds, herbs, or even a sprinkle of cinnamon for a unique twist.
Must-Have Products for Gluten-Free Sourdough Recipe
To help you on your gluten-free sourdough journey, here’s a curated list of essential products to make the process smoother and more enjoyable:
Flours and Starches
- Bob’s Red Mill Brown Rice Flour – A versatile flour perfect for gluten-free sourdough starters and dough.
- Organic Sorghum Flour – Adds a mild sweetness and structure to your bread.
Binders and Additives
- NOW Foods Psyllium Husk Powder – Provides structure and elasticity in gluten-free baking.
- Bob’s Red Mill Xanthan Gum – A reliable binder for consistent results.
Starter and Dough Tools
- Kilner Glass Jar with Airtight Lid – Ideal for maintaining your sourdough starter.
- OXO Good Grips Mixing Bowl Set – Sturdy, non-slip bowls perfect for mixing dough.
These products are thoughtfully chosen to make your gluten-free sourdough adventure a seamless and enjoyable experience. With the right tools and ingredients, you’re set up for success!
Storage and Shelf Life
Treat your bread with care. Store it in a paper bag or bread box to maintain the crust. If it lasts longer than a few days, slice and freeze it—ready to toast at a moment’s notice.
Health Benefits of Gluten-Free Sourdough
The fermentation process doesn’t just make bread tastier; it makes it kinder to your body. It’s easier to digest and unlocks nutrients that would otherwise remain hidden. Think of it as bread’s way of saying, “I care about you.” This gluten free sourdough recipe is easy and great for your wellness!
Enhancing Gluten-Free Bread with Sourdough Biotechnology
Scientific research has shown the transformative potential of sourdough fermentation in gluten-free baking. A review on sourdough biotechnology highlights how lactic acid bacteria can enhance the structure, texture, and nutritional properties of gluten-free bread. Similarly, another study on functional gluten-free sourdough bread demonstrates how incorporating pseudocereals and Moringa oleifera significantly improves protein, mineral, and antioxidant levels, offering a healthier and more appealing alternative for those with gluten sensitivities. Together, these findings underscore the power of sourdough fermentation to revolutionize gluten-free baking.
Troubleshooting Your Sourdough
Sometimes, things don’t go as planned. That’s okay—it’s all part of the learning curve:
- Dense bread? Give your dough more time to proof.
- Crumbly texture? Add psyllium husk or xanthan gum for better structure.
- Flat loaf? Check that your starter is lively and active.
Every loaf teaches you something new, so embrace the process.
How Gluten-Free Sourdough Differs from Regular Sourdough
Without gluten, you’re leaning on binders like psyllium husk to create structure. It’s a little trickier, sure, but the reward is a bread that’s all your own.
Why Homemade Beats Store-Bought
Store-bought bread can’t hold a candle to the warmth and flavor of homemade. When you bake your own, you’re not just making bread—you’re making memories. The smell that fills your kitchen, the satisfaction of slicing into a perfect loaf—it’s pure magic.
Creative Uses for Gluten-Free Sourdough
Your bread doesn’t have to stop at sandwiches:
- French Toast: A decadent way to start the day.
- Croutons: Elevate your soups and salads.
- Breadcrumbs: Perfect for gluten-free cooking.
Sourdough is the gift that keeps on giving.
Summary
Gluten-free sourdough is more than bread—it’s an experience. It’s about reconnecting with the simple, beautiful act of baking. With every loaf, you’re not just feeding yourself; you’re feeding your spirit. So roll up your sleeves, dust off your apron, and let’s bake some magic together with this simple gluten free sourdough recipe.
Check this out:
FAQs
1. Can I make sourdough starter with just one type of flour?
Yes, but a blend of flours typically yields better flavor and texture.
2. How do I know if my starter is ready?
It should be bubbly, double in size, and smell tangy. A drop in water should float.
3. Do I need to refrigerate my starter?
Once it’s established, you can refrigerate it and feed weekly.
4. What can I substitute for psyllium husk?
Try xanthan gum or ground chia seeds for similar binding properties.
5. Is gluten-free sourdough healthier than regular gluten-free bread?
Yes, because of its fermentation process, which enhances nutrient availability and improves digestion.


