Easy Gluten Free Pita Bread Recipe for Home Bakers
We may earn a commission for purchases made using our links. Please see our disclosure to learn more.
If you love warm, soft pita bread but gluten doesn’t love you back, you know how frustrating it can be to give up that chewy, pocket-perfect flatbread. Store-bought gluten free versions often come with a high price tag, dense texture, or dry bite — a far cry from the fluffy pita experience you remember. But here’s the good news: you can recreate that magic at home. This easy gluten free pita bread recipe is crafted for home bakers of all skill levels, delivering soft, flavorful pitas that are perfect for stuffing, dipping, or savoring warm with a drizzle of olive oil.
Why Make Gluten Free Pita Bread at Home?
There are plenty of reasons to try your hand at homemade gluten free pita bread:
- Freshness: Nothing beats warm bread straight from the oven.
- Cost Savings: Store-bought gluten free bread can be pricey, while homemade versions cost just a fraction per piece.
- Customization: Adjust the flavor, thickness, and size to your liking.
- Ingredient Control: You know exactly what’s going into your bread — no mystery additives.
Key Ingredients for the Perfect Gluten Free Pita
Making a gluten free pita that’s soft, chewy, and sturdy enough to hold fillings is all about balancing the right ingredients.
Gluten-Free Flour Blend
The foundation of your pita is a quality flour blend. Choose a premium gluten-free all-purpose flour blend that balances whole grain flours (such brown rice) with starches (like potato and tapioca). Another option is to create your own mixture by mixing equal amounts of tapioca starch, potato starch, and rice flour.
Binders That Make the Dough Work
You’ll need a substitute because wheat bread naturally contains gluten as a binder. Because it absorbs water and forms a gel-like consistency, psyllium husk powder is perfect for adding flexibility to dough. Although psyllium tends to provide a softer, more bread-like texture, xanthan gum also works.
Leavening Agents
Yeast gives pita its airy texture and signature puff. Use instant or active dry yeast for best results. For a quick, no-rise recipe, you can substitute baking powder, though the texture will be different.
Liquids and Fats
Warm water activates the yeast, while olive oil adds flavor and tenderness. For a richer taste, substitute part of the water with plain yogurt or milk.
Step-by-Step Gluten Free Pita Bread Recipe
Ingredients (Makes 6 pitas)
- 2 cups gluten-free all-purpose flour blend
- 2 tbsp psyllium husk powder
- 1 packet (2¼ tsp) instant yeast
- 1 cup warm water (110°F / 43°C)
- 2 tbsp olive oil
- 1 tsp sugar or honey
- 1 tsp salt
Step 1 – Prepare the Yeast
In a small bowl, mix warm water with sugar and yeast. Stir gently and let it sit for 5–10 minutes, or until frothy. This “proofing” step ensures your yeast is active.
Step 2 – Combine Dry Ingredients
In a large mixing bowl, whisk together the flour blend, psyllium husk powder, and salt. Make a well in the center for the wet ingredients.
Step 3 – Mix and Knead
Pour the yeast mixture and olive oil into the flour mixture. Stir until combined, then knead gently (or use a stand mixer with a dough hook) for 5–6 minutes. The dough should feel soft, pliable, and slightly sticky.
Step 4 – Proof the Dough
Shape the dough into a ball, place it in a lightly oiled bowl, cover, and let it rise in a warm place for 45–60 minutes, or until doubled in size.
Step 5 – Shape the Pitas
Punch down the risen dough and divide it into six equal pieces. Roll each piece into a ball, then flatten into circles about 6–8 inches wide and ¼ inch thick. Keep thickness even for proper puffing.
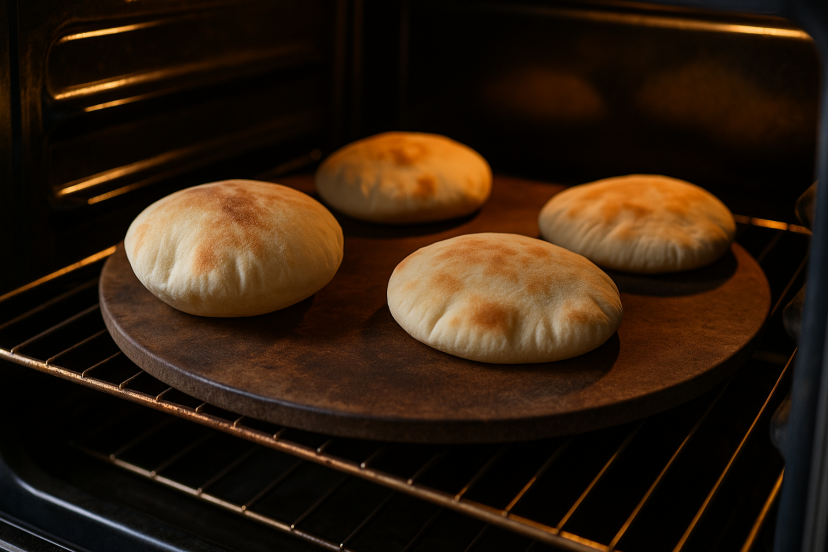
Step 6 – Bake at High Heat
Preheat your oven to 450°F (240°C) with a baking stone or an upside-down baking sheet inside. Once hot, place the pitas directly on the surface. Bake for 5–7 minutes, or until puffed and lightly golden. Flip and bake for an additional 1–2 minutes.
Tips for Foolproof Gluten Free Pita Bread
- Preheat thoroughly: The hot surface is key to steam-puff pockets.
- Use fresh yeast: Old yeast won’t give the rise you need.
- Don’t overbake: Overcooking can make pitas tough.
- Roll evenly: Uneven dough thickness leads to poor puffing.
Recommended Tools and Products
- Bob’s Red Mill Gluten-Free All-Purpose Baking Flour – A versatile blend that works well in bread recipes.
- NOW Foods Psyllium Husk Powder – The secret to a stretchy, soft dough.
- Red Star Instant Yeast – Consistent rise and flavor.
- Lodge Cast Iron Baking Stone – Retains heat for perfect puff.
- OXO Good Grips Nonstick Rolling Pin – Helps achieve even dough thickness.
The Science Behind Psyllium’s Magic in Gluten-Free Baking
Psyllium husk is more than just a gluten substitute — it changes the chemistry of gluten-free baking. Studies show it improves dough elasticity, moisture retention, and overall texture in baked goods. For example, research on psyllium in gluten-free bread found that adding psyllium cut crumb firmness by 65–75% over 72 hours and delayed staling, resulting in better structure and taste. Similarly, a study on psyllium husk in rice-based gluten-free dough showed stronger resistance to stretching, higher bread volume, and reduced water loss — all signs of improved quality. This is why many bakers prefer psyllium over xanthan gum for breads and pitas.

Serving Ideas for Fresh Pita
- Stuffed Sandwiches: Fill with grilled chicken, veggies, and tahini.
- Pita Chips: Cut into wedges, brush with olive oil, and bake until crisp.
- Mini Pita Pizzas: Top with sauce, cheese, and veggies, then broil.
Storing and Reheating
- Room Temperature: Store in an airtight container for up to 2 days.
- Freezer: Wrap individually and freeze for up to 2 months.
- Reheat: Warm in a skillet or oven for 1–2 minutes to restore softness.
Conclusion
Making your own gluten free pita bread recipe at home is easier than you might think — and far more rewarding than settling for store-bought. With the right flour blend, a reliable binder like psyllium husk, and a blazing hot oven, you can enjoy soft, chewy, and flavorful pitas anytime. Once you try these fresh from your own oven, you may never go back to packaged bread again. And if you’re looking for more easy, fresh ideas to enjoy alongside your pita, check out this no-cook summer meals guide for quick, flavorful dishes that pair perfectly.
FAQs
Q1: What is the trick to making good gluten-free bread?
A good gluten-free bread needs a balanced flour blend, a reliable binder, and enough moisture to prevent dryness. Baking at the right temperature also makes a huge difference.
Q2: How is gluten-free bread made?
It replaces wheat flour with gluten-free alternatives and uses binders like psyllium husk or xanthan gum to mimic gluten’s elasticity.
Q3: What are the ingredients in be free pita bread?
Typically, gluten-free flour, water, oil, yeast, salt, and a binder such as xanthan gum or psyllium husk.
Q4: What holds gluten-free bread together?
Binders trap air from yeast fermentation and keep the dough’s structure intact during baking.
Q5: What ingredients to avoid in gluten-free bread?
Avoid any gluten-containing grains like wheat, barley, rye, and malt. Always check for hidden gluten in flavorings or additives.