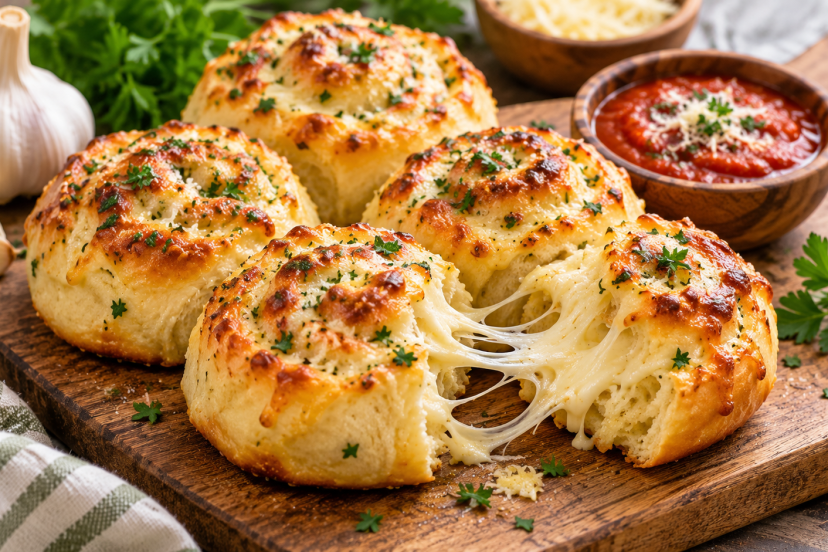
Cheesy Garlic Rolls Recipe: Easy and Delicious
We may earn a commission for purchases made using our links. Please see our disclosure to learn more.
Homemade rolls can go wrong fast when the dough turns dense, the cheese leaks out, or the garlic flavor fades in the oven. These cheesy garlic rolls solve those problems with a soft enriched dough, a mozzarella-Parmesan filling, and garlic butter added both before and after baking. The result is a pan of tender, pull-apart rolls with browned edges, melted cheese, and plenty of savory garlic flavor. The method is simple enough for a weekend bake, and most of the time is hands-off while the dough rises.
Ingredients
Soft Roll Dough
- 1 cup whole milk, warm
- 2 1/4 teaspoons instant yeast
- 2 tablespoons granulated sugar
- 1 large egg, room temperature
- 4 tablespoons unsalted butter, melted and slightly cooled
- 3 1/4 cups all-purpose flour, plus more as needed
- 1 teaspoon fine salt
Cheesy Garlic Filling
- 1 1/2 cups shredded low-moisture mozzarella
- 1/4 cup finely grated Parmesan
Garlic Butter Topping
- 4 tablespoons unsalted butter, melted
- 3 garlic cloves, finely minced or grated
- 1 tablespoon chopped fresh parsley
- Pinch of salt
Low-moisture mozzarella melts well without releasing as much water as fresh mozzarella. Parmesan adds a sharper, saltier flavor that keeps the filling from tasting flat.
How to Make Cheesy Garlic Rolls
1. Mix and Knead the Dough
Pour the warm milk into a large bowl. Add the yeast, sugar, egg, and melted butter, then whisk to combine.
Add the flour and salt. Stir until a shaggy dough forms, then knead for about 7 to 8 minutes by hand or 5 to 6 minutes with a dough hook. The dough should feel soft and slightly tacky, not wet or stiff.
If necessary, add extra flour 1 tablespoon at a time. Adding too much can make the finished rolls dry.
2. Let It Rise
Place the dough in a lightly greased bowl, cover it, and leave it in a warm spot until roughly doubled, usually 60 to 90 minutes.
Use the dough’s appearance more than the clock. Yeast dough can rise faster or slower depending on temperature, so visible expansion is the better guide.
3. Make the Garlic Butter
Mix the melted butter, garlic, parsley, and salt. Set half aside for brushing over the rolls after baking.
4. Fill and Shape
Roll the risen dough into a rectangle about 12 by 18 inches. Brush half of the garlic butter over the surface, leaving a small border along one long edge.
Sprinkle the mozzarella and Parmesan evenly over the dough. Starting from the opposite long edge, roll it into a snug log and pinch the seam closed.
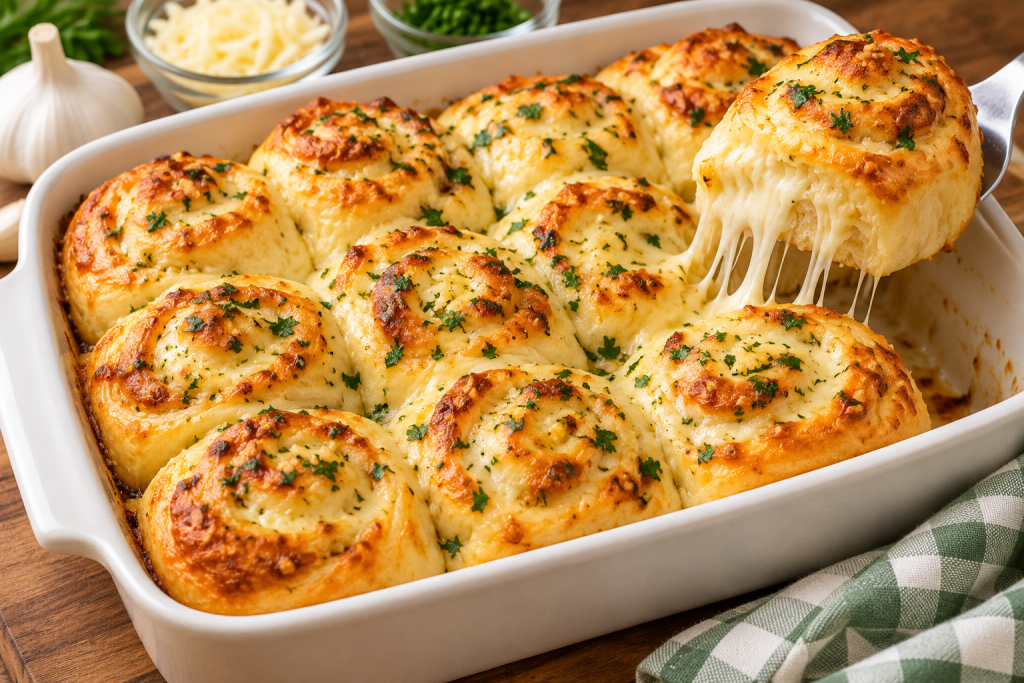
Cut into 12 even pieces and arrange them cut-side up in a greased 9-by-13-inch baking dish.
5. Proof Again
Cover the pan loosely and let the rolls rise for 30 to 45 minutes, or until they look noticeably puffy.
A gentle finger press can help. If the indentation returns slowly instead of immediately springing back, the dough is close to ready.
6. Bake and Finish
Heat the oven to 375°F. Bake for 20 to 24 minutes, until the tops are golden and the centers are baked through.
If the tops darken too quickly, cover the pan loosely with foil. For an extra check, soft white breads commonly finish around 190°F internally.
Brush the hot rolls with the reserved garlic butter and let them rest for about 10 minutes before serving.
Tips for Better Garlic Rolls
Keep the dough slightly tacky rather than loading it with extra flour. A softer dough usually produces a softer roll.
Use finely minced or grated garlic so the flavor spreads evenly. Large chunks can brown quickly and create harsh bites.
Freshly shredded cheese usually melts more smoothly than pre-shredded cheese. Also, give the shaped rolls enough time to become visibly puffy before baking; under-proofed dough often produces tight, heavy rolls.
Do not taste the raw dough. The FDA notes that flour is a raw food and may carry harmful bacteria, so dough should be fully baked before eating.
Easy Variations
Add 1 teaspoon of Italian seasoning to the filling for a stronger herb flavor. Chopped chives or rosemary also work well.
For a little heat, stir red pepper flakes into the garlic butter. You can also replace part of the mozzarella with provolone or low-moisture whole-milk mozzarella for a richer cheese flavor.
For a pizza-inspired version, spread a very thin layer of marinara over the dough before adding the cheese. Keep it light so the rolls do not become soggy.
What to Serve With Cheesy Garlic Rolls
These rolls pair naturally with tomato soup, baked pasta, roasted chicken, meatballs, or a crisp salad. Their garlic and Parmesan flavor also works well beside creamy pasta dishes.
For another homemade bread option, try this sourdough focaccia recipe.
Storage and Reheating
Cool leftovers completely, then keep them in an airtight container at room temperature for up to 2 days or refrigerate for up to 4 days. For longer storage, freeze tightly wrapped rolls for up to 2 months.
Reheat at 325°F for about 8 to 10 minutes. Loosely covering the rolls with foil helps keep the tops from drying out.
Recommended Products for Making Cheesy Garlic Rolls
1. OXO Good Grips Silicone Pastry Brush
This silicone brush is useful for spreading garlic butter over the dough and brushing the hot rolls after baking. OXO lists heat-resistant silicone bristles and dishwasher-safe construction.
2. OXO Good Grips Multi-Purpose Scraper & Chopper
A bench scraper makes it easier to divide the dough cleanly and scrape sticky dough from the counter. This model uses a stainless steel blade with measurement markings.
3. Escali Primo Digital Food Scale
Weighing flour can improve consistency from batch to batch. The Escali Primo measures in 1-gram increments and includes a tare function for weighing ingredients directly in a bowl.
4. Nordic Ware Naturals Baker’s Half Sheet
This aluminum half-sheet pan is useful when you want more space between the rolls instead of baking them tightly together in a casserole dish. The same pan also works for cookies and roasting.
5. ThermoPro TP19H Instant-Read Thermometer
An instant-read thermometer can help you check the center of bread when visual cues are unclear. The TP19H is a folding digital thermometer with a backlit display and stainless steel probe.
Baking Safety and Dough Tips
Working with yeast dough is simple, but a few basic habits can improve both safety and texture. According to the FDA’s guidance on handling flour safely, raw flour can contain harmful bacteria, so avoid tasting uncooked dough and wash bowls, utensils, counters, and hands after handling it.
For softer, lighter rolls, pay attention to the dough rather than relying entirely on the clock. King Arthur Baking’s yeast baking guide recommends using visual and tactile cues when proofing. For these cheesy garlic rolls, the dough should roughly double during the first rise and look noticeably soft and puffy after shaping before it goes into the oven.
Room temperature can change rising times, so a batch may need a little longer on a cool day. Giving the dough enough time to proof helps create a lighter texture and better-defined layers around the cheese filling.
Conclusion
These cheesy garlic rolls come down to three details: keep the dough soft, give it enough time to rise, and save some garlic butter for the moment they leave the oven. That combination gives you tender spirals, melted cheese in every layer, and a stronger garlic finish. For your first batch, pay closest attention to the second rise. Once the shaped rolls look light and puffy, they are ready for the oven.
FAQs
Can I use active dry yeast instead of instant yeast?
Yes. Use the same amount, but expect the dough to rise a little more slowly. Judge readiness by volume rather than an exact time.
Can I make cheesy garlic rolls ahead of time?
Yes. Shape the rolls, cover the pan, and refrigerate overnight. Let them sit at room temperature until puffy before baking.
What cheese works best?
Low-moisture mozzarella gives a reliable melt without adding too much water. Parmesan adds sharper flavor, while provolone can be used for a richer variation.
Why did my rolls turn out dense?
Too much flour, insufficient kneading, or baking before the second rise is complete can all make rolls dense. The shaped dough should look visibly puffy before baking.
Can I freeze cheesy garlic rolls?
Yes. Freeze fully cooled rolls in an airtight container for up to 2 months. Thaw in the refrigerator, then warm them in a low oven.